NOTE: the object of this game, is not only to escape but more importantly to restore complete light to the room!
1- everything is pitch black. navigate until you find a screen that is not completely black & click on the blinds to zoom in. pull on the green handle of the cord to open them. this will create your 1st weak source of light. zoom out.

2- turn left & click the area where the light from the window is shining down on. when zoomed in, you will see a KEY. take it then press the button on the other object thats in the shadows to turn on more lights. take a good look at these lights & memorize which are YELLOW (1 3 5 6), as it will be important later. zoom out.

3- zoom in on the new lit up area, you will see some numbers on the wall. the letters below it are not important, but MAKE SURE YOU NOTE THE NUMBERS EXACTLY AS SHOWN as they will be used soon & are not viewable when its time to use them!
526
764
381
 once youve noted the numbers press the 7 & zoom out.
4- turn right. pressing that 7 has turned on a new light. zoom in on the phone. take the 1ST BATTERY from beside the phone. next, lift the receiver & press the button under it to trigger more lights. zoom out.
5- zoom in on the pink box below the phone. use your key on it to unlock it & reveal a blue sphere, which will roll away as soon as you touch it. now click on the box twice more to move it & reveal a hint with 5 numbers.

note these 5 numbers down below the 9 numbers you noted down earlier (they are used TOGETHER!) & zoom out.

6- click on the sphere that has rolled away to zoom in. click it once more while zoomed in to move it to the other side of the buttons. now, you will notice these buttons are pressable. there are 7 buttons - number seems familiar? apply the "code" from the 7 light panel in step 2 to solve these buttons (turn on buttons 1, 3, 5, and 6). when done, zoom out & turn left.
7- you will see that the 7 light panel on the floor has moved, revealing a keypad & the 9 numbers i told you to note down are no longer visible. click the keypad to zoom in & you will see you can press the 9 buttons to turn them purple. as the diagram under the pink box suggests, you need to press buttons 1, 7, 4, 3 & 2, to continue. but the catch is that they are not numbered 1-9, but instead mixed up!
 so how to know which number is which? simple - apply the 9 numbers i told you to write down at the start! this makes the keypad read:
526
764
381
 now just press 17432 according to that - or rather, if you dont wanna apply those numbers & wish to read the buttons as 1-9 instead, then press buttons 94672. when done correctly, a bright light will shine across the room & the 3rd wall will be explorable! zoom out.
8- turn right twice. click on the curtains to open them, letting yet more light into the room. click the desk to zoom in. click the computer to open it. click the screen to zoom in. you will see a diagram drawn on it, which represents the dialpad on the phone. memorize the path (1569832407green) & zoom out 3x.

9- go left back to the phone & enter the above code into it by pressing the appropriate numbers, incidently green is the left button. if done correctly, the numbers will slide to the left & disappear. zoom out.
10- turn left twice to face the 4th wall, which has now been lit by the magical phone number! click the device to zoom in, then click the white box on the lower left to open it. flick the switch inside & zoom out.
11- turn left, a new light has been activated near the ceiling, revealing a switchboard. zoom in & flick the bottom right switch so that it is matching all the others, then zoom out.

12- you will now see that to the left of the computer desk, a new light is shining. click it to zoom in. take the SECOND BATTERY. you may also plug in the cord, but its defective anyway & you cant take the plugged in light out yet either, but later you can. just zoom out after getting the battery.
13- click the desk again to zoom in, click the left drawer to open & insert your batteries into the device to activate it. close the drawer, and you will now see 4 symbols on the floor. memorize their order (5-point star, 6-point star, asterisk, 4-point star) & zoom out.

14- turn right & zoom back in on the wall safe. arrange the 4 colored buttons on the top as the floor code said (so it will be yellow red green blue). when done, hit the button in the middle to open the safe. obtain the FLOWER LIGHT & zoom out.
15- turn left, go back to the wall outlet (left of the desk) & plug in your flower light into the upper socket. this will really light up the area brightly & you can see that the cord i told you not to bother with isnt even connected to anything lol! the real computer cord, however, you will want to plug in. to do this, remove the smaller light from the lower socket (you can do it now since theres another light source). plug in the computer, and then click on the yellow bit of the light you just removed (its the bulb) to get the DRAWER KEY. zoom out.
16- zoom in on the desk yet again. use the new key on the right drawer & open it to get the RED DIAMOND.
17- click on the computer to zoom in (twice). now that its plugged in, you can hit the white button to the left to turn it on. click on unlock.exe & you will come face to face with the hardest puzzle in the entire game. here is a screenshot i made of the squares you have to turn black for it to work:
 click start & let the animation run its course - when your character gets to the star, a robot will appear & "kill" him. a star will pop out & that is a new puzzle, but we cant solve it just yet. for now just zoom out 3 times.
18- turn right & zoom in on the wall safe again. put the red diamond into the new slot to trigger the mechanism. also, click & open the white box on the right this time (it wasnt open before the robot sequence on the computer). flick the red switch you see inside & note the numbers "060-", for they will matter in the next puzzle. zoom out when done.

19- turn left, zoom in on the switchboard (top right corner) again & see "-1734". zoom out, turn right twice & zoom in on the area where the window light is shining through. now that the 7 light panel has moved, you can see "-2619-" on the wall.

Lets put this 3 part code together, using the dashes to guide us: 060-2619-1734. looks like a phone number huh? then its obvious what to do next, zoom out.
20- turn right to return to the phone & zoom in to dial the above code of: 06026191734. hit the green button (bottom left) when all 11 numbers are input. "calling..." should now scroll across the LED. zoom out.
21- turn right twice & you will see a flickering green light in the darkness as well as hearing ringing. click it to zoom it- it is a cell phone! click to open & again to zoom in on the screen. click the screen to receive the message & click the button on the screen to send it to the computer. zoom out twice.
22- zoom back in on the cell phone - the battery has died. however, you will see a color code. blue green yellow red. remember this for later & zoom out again.

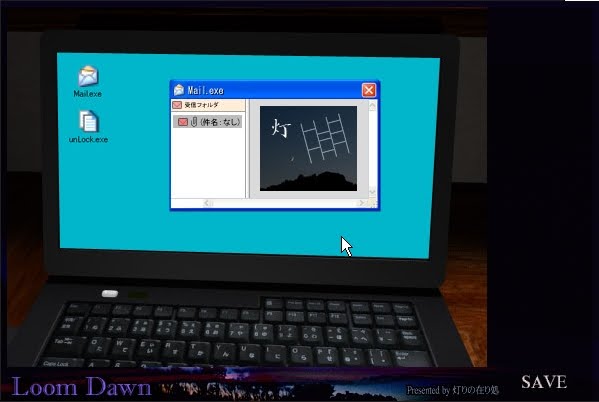
23- you can go check the mail you sent to the computer (by turning left, clicking on the computer 3x, turning it on, clicking mail.exe & clicking the mail) but its not needed to solving the game & is just a pretty picture of the night sky, nothing more.
Instead, zoom in on the door that has now appeared next to the wall safe. you cant open it yet, but you can zoom above the handle to see 4 hearts. the colours on them match the code we saw on the cell phone, but they are in the wrong order & cant be rearranged here. instead, lets try searching for something else that has the same colours - zoom out.
24- the wall safe. the 4 buttons at the top have the exact same colours! go back to it (by zooming out twice then clicking on the safe) & rearrange the colors to match what you saw on the cell phone in step 22 (blue green yellow red). now zoom out, zoom in on the doo r& pull on the handle to open it!!!! then click on the outside light & you are OUT - congrats? no!... its not over yet!
INTERLUDE
------------------------------------------------
well, congrats on solving the 1st objective of the game, escaping. this game is long, so take a breather to enjoy the outdoor scenery. when done, mouse over the pink japanese characters at the bottom right & a text will appear. read the white text & you will see that, in order to see the true form of the room, you need to turn on the main lighting system. this is the ultimate goal in this game, not escaping :-P
when ready to continue your adventure, click where it says "go back to the room" to continue where you left off.
------------------------------------------------ End interlude
25- it is VERY easy to miss, but if you pay close attention to the 1st screen after returning inside you will see white markings at the very top of the doorway! (door must be open) click that area to zoom in & see a new clue. look familiar? its a reference to the switchboard! so from top left to bottom right: down, up, down, down, down, up - & then main switch down. remember this & zoom out 2x.

26- turn left & return to the switchboard. note, you can only move the buttons IF youve seen the clue above the doorway otherwise it wont work!!! anyway:
DUD
DDU
 where D-down position & U-up position. then flick the master switch to the left into the down position. zoom out when done.
27- turn left twice. you will see that now the keypad on the wall has moved up, revealing a secret compartment! if youre wondering what to do here, pay close attention to the symbols in the 2 circular alcoves. blue circle and red diamond... i think we've seen these objects before! lets go back & find them. zoom out.
28- turn left, zoom in on the wall safe to remove & RECLAIM RED DIAMOND. zoom out.
29- turn right twice, zoom in on the glowing blue sphere at the floor & click it to obtain BLUE SPHERE, zoom out.
30- turn left, insert these 2 objects into the proper slots on the wall compartment. something will appear in the middle segment. its not too clear what to do next but this is a walkthrough so dont worry! zoom out.
31- turn left, zoom in on the cell phone again & you can now pick it up (only works after the shapes are in the wall). obtain CELL PHONE & turn right then plug it into the wall compartment where you put your shapes to recharge it! it will now show 12 squares but you need to find more clues to solve this puzzle so zoom out.
32- now if you recall, you might have seen bars consisting of 3 black/white segments scattered around the room. they are:
1- by flower light- top+middle are black

2- in left white box at the wall safe- bottom is black

3- by hearts above doorknob- middle is black

4- by phone- top+bottom are black

but what is the proper order for these 4 clues? zoom in on the computer desk to see some odd markings under the right side of the window. zoom in on those. we have found the order!!! it is: wall safe, flower light, telephone, door hearts. now return to the recharged cell phone by zooming out twice, going left twice & clicking the phone.

33- arranging the 4 bars by the order listed above gives us this code for the phone puzzle:-
OXXO
OXOX
XOXO
where X-black & O-white. enter that & a purple ray will shoot towards the door!
34- go back to the door & open it. click the purple object at the bottom - it is a doorstop! this allows you to leave the door without it shutting, allowing more light to shine into the room! zoom out & turn right twice. zoom in on the small window again & pull the blinds shut - you will see the answer to the star puzzle! zoom out.

35- turn right, zoom in & turn on the computer again. go back to unlock.exe. click the star to bring up the star puzzle, & solve it with the code you just saw. now the little guy is rejuvenated & gets some revenge on that mean robot!
 congrats, you have finallybeaten the computer game. on the "the end" screen, click the shining star near the top. the message "the night is over" will be displayed & the ENTIRE room will be FULLY lit now!!!
CONGRATULATIONS! you have solved a nice, long game. i wish they would make more like this one, it was beautiful, & challenging!
CLOSURE
you may now explore around the room & see what its like but theres nothing left to do. you can also go back outside, but there is nothing new there. seeing the true form of the room was the end of the game, congrats!
No comments:
Post a Comment